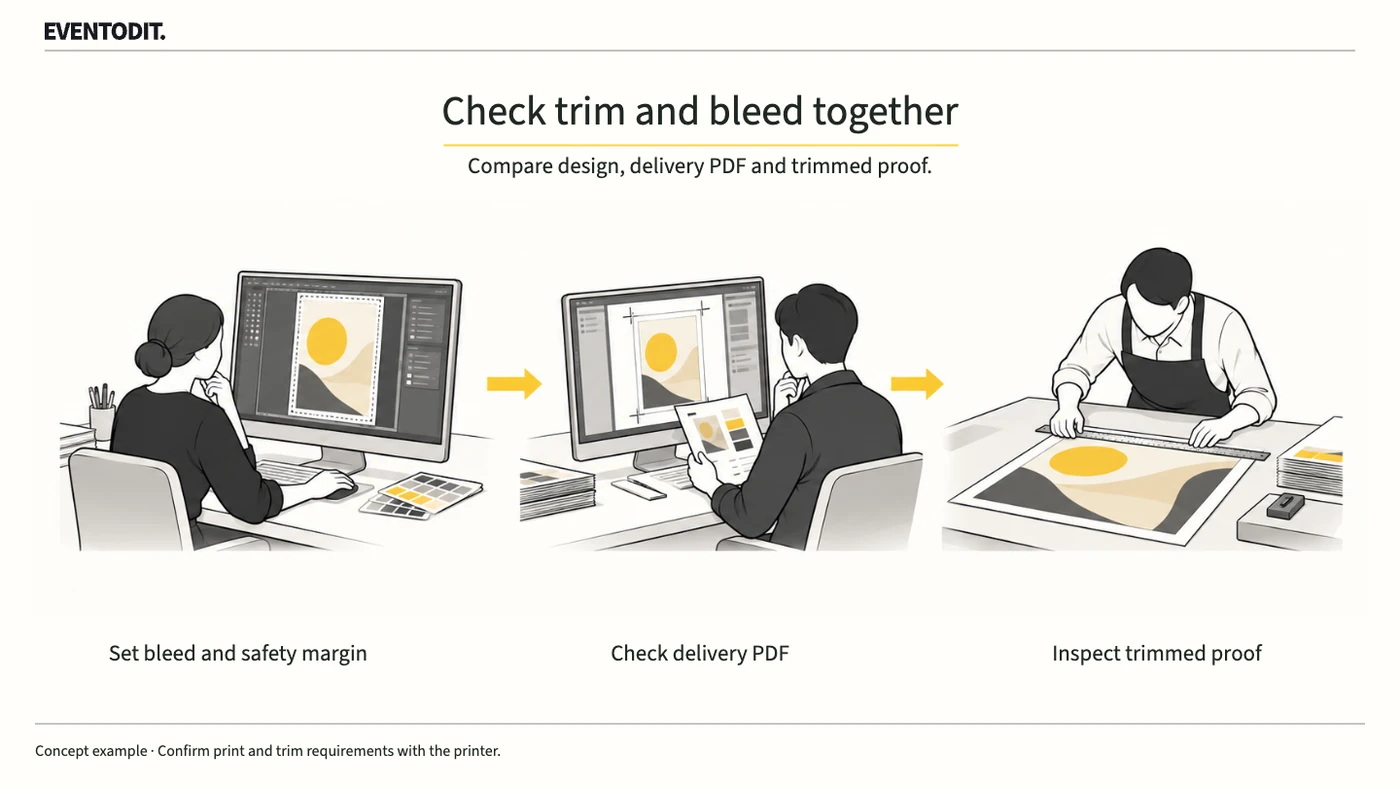
Part 1. Planning and print procurement lead
“Setting a bleed value is not the end. Confirm the printer’s output requirements and the proof before authorising the run.”
- Obtain the finished size and bleed: Before ordering, obtain the finished trim size and required bleed from the printer and give them to the designer. Requirements can vary by production method, so do not apply one value to every item.
- Agree a safe distance for critical information: Set the distance from the trim edge with the printer for logos, dates, venues and other information that must not be cut off.
- Separate online and print PDFs: Do not substitute an online promotional PDF for the printer’s agreed delivery file. Distinguish each file’s purpose and version.
- Record screen and physical proofs separately: Record what was reviewed in a PDF viewer and what was checked on an actually printed and trimmed sample. Do not record a physical inspection that did not occur.
- Assign print-run approval and define the review: Confirm bleed, marks and artwork extension, identify the final delivery file and name the person authorised to approve reprints or mass production. A bleed review does not replace checks of colour, paper or finishing.
Part 2. Graphic design
“Do not stop at entering a document value. Extend edge artwork to the bleed and keep critical information within the agreed safe distance.”
- Extend artwork into the bleed: Setting Bleed and Slug under File > Document Setup in InDesign does not automatically extend a background or image. Extend the background, photograph and frame intended to print to the edge through to the bleed guide, and check that the image fills the extended frame. Confirm any intentionally white border with the printer.
- Compare critical information against the safe area: Check that logos, event title, date and venue are not too close to the trim edge, and place them inside the safe distance agreed with the printer.
- Include the document bleed in the print PDF: When exporting Adobe PDF (Print), check Use Document Bleed Settings under Marks and Bleeds to include the configured document bleed in the PDF.
- Select crop marks and slug as required: Crop Marks indicate trimming positions; they do not extend the artwork. Follow the printer’s specifications for marks, individual pages or spreads, and inclusion of the separate Slug job-instruction area. Check mark placement and offset so marks do not overlap the bleed.
- Inspect preset settings: Even when using the printer’s recommended preset, do not treat its name as print approval. Compare the actual export options with the required specifications.
Part 3. Output, production and handover review
“Do not rely on the working view. Inspect three areas of the actual delivery PDF and align its version with the printer.”
- Compare three areas of the delivered PDF: Open the final PDF rather than the editable source. Compare text, logos and finished size inside the trim; background extension beyond it; and crop marks and slug against the printer’s requirements. The PDF page dimensions can include bleed and marks, so check the finished size against the printer’s requirements and the TrimBox setting.
- Correct the source and export again: If text or dimensions are wrong, revise the source. If a background stops short of the agreed bleed, extend the artwork, export a new PDF and review it again.
- Record version and review time: Distinguish revisions in the filename and record when each was checked. Confirm that the printer received the same final file that passed review.
- Inspect a physical sample: When a printed and trimmed sample is available, measure its finished size and check for white edges and cut-off critical text. Record the result.
The following editorial table provides a review sequence against the specifications agreed with the printer.
| Area | What to inspect | Action if it differs |
|---|---|---|
| Inside the trim | Wording, logo placement and finished size | Correct placement or document size and export again |
| Beyond the trim | Backgrounds and images reaching the agreed bleed edge | Extend the artwork and inspect the new PDF |
| Marks and job instructions | Required marks and slug | Revise to the output conditions agreed with the printer |
Scroll sideways if needed to read every column.
Use the original records and supporting templates
Use the printer’s job specification and proof-approval record as the authoritative register. For each print ID, link finished dimensions, required bleed and safe area, final PDF filename/version, the file actually received by the printer and the approver. Record screen proofing separately from inspection of a printed and trimmed sample, leaving uninspected samples unconfirmed. Add the correction owner, deadline and re-export results to that register rather than maintaining duplicate records.
Final check before use: Before approving the production run, cross-check the printer’s finished size and bleed, artwork extension and the actual delivery PDF inside and outside the trim.
Conditions for applying this elsewhere
Follow the provider’s bleed, marks, page output and proofing requirements. This is separate from complete colour/finishing acceptance.
Information not established
No particular bleed measurement, preset, physical proof or print result has been established.
Reference material
Have a correction or additional evidence? Request a correction